Imagine you’re writing a story. You’ve got awesome characters and a super exciting plot. But when you look closer, you see weird marks all over the place! These marks are like the behind-the-scenes stuff in a movie. They’re not part of the story, but they help put everything together.
In Word 365, these “behind-the-scenes” marks are called format marks. They show you things like spaces, tabs, and where paragraphs start and end. Sometimes, these marks are helpful, but sometimes they just get in the way. This article will show you how to make those marks disappear!
What are Format Marks?
Format marks are special symbols that show how your text is organized. They’re like secret codes that tell Word how to display your document. You don’t usually see them when you’re typing, but they’re always there, working behind the scenes.
Here are some common format marks you might see:
| Format Mark | What it looks like | What it means |
|---|---|---|
| Space | . | Shows a space between words |
| Paragraph mark | ¶ | Shows the end of a paragraph |
| Tab | → | Shows where you pressed the Tab key |
| Line break | ↵ | Shows where a line ends within a paragraph |
| Non-breaking space | ° | Shows a space that won’t break at the end of a line |
Why Hide Format Marks?
Sometimes, seeing all those format marks can be distracting. It’s like trying to read a book with lots of scribbles in the margins! Hiding them can make your document look cleaner and easier to read.
How to Remove Format Marks in Word 365: A Step-by-Step Guide
Ready to make those format marks vanish? Here’s how:
- Open your Word document. Start by opening the document where you want to hide the format marks.
- Go to the Home tab. Look at the ribbon at the top of the Word window. Click on the “Home” tab.
- Find the Paragraph group. On the Home tab, look for a section called “Paragraph.”
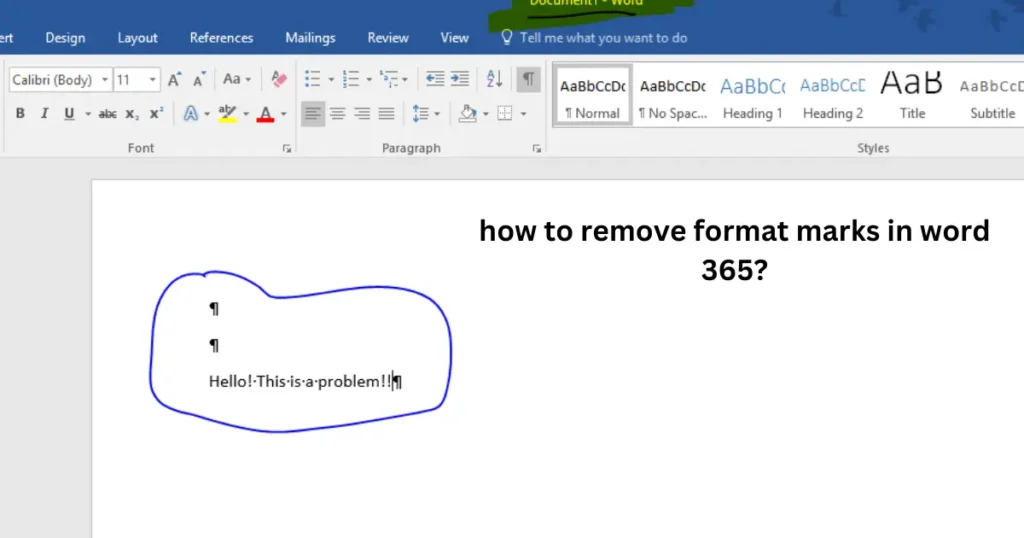
- Click the Show/Hide button. In the Paragraph group, you’ll see a button that looks like a backward “P” ( ¶ ). This is the Show/Hide button. Click it!
Poof! Just like magic, the format marks will disappear. Click the button again if you want to see them again.
Troubleshooting: Format Marks Still Visible?
Sometimes, even after clicking the Show/Hide button, you might still see some format marks. Don’t worry! Here are a few things to check:
- Check the Zoom level: If your document is zoomed out a lot, some format marks might still be visible. Try zooming in to get a closer look.
- Look for specific formatting: Some types of formatting, like hidden text or field codes, might still show up even when format marks are hidden.
- Hidden text: To show or hide hidden text, go to the “Home” tab, click the arrow next to the “Font” section, and check or uncheck the “Hidden” box.
- Field codes: To toggle between displaying field codes and their results, right-click on the field code and select “Toggle Field Codes.”
How to Remove Format Marks in Word 365 Permanently
You can’t actually remove format marks permanently. They’re an essential part of how Word works. However, you can make them invisible by default. Here’s how:
- Go to File > Options. Click on the “File” tab, then select “Options” at the bottom of the menu.
- Select Display. In the Word Options window, click on “Display” in the left-hand menu.
- Uncheck “Show all formatting marks.” Under the “Always show these formatting marks on the screen” section, uncheck the box next to “Show all formatting marks.”
- Click OK. Click the “OK” button to save your changes.
Now, whenever you open a new document, the format marks will be hidden by default.
Tips and Tricks for Working with Format Marks
- Use the Show/Hide button selectively: You don’t have to hide all format marks all the time. Sometimes, it’s helpful to see them, especially when you’re troubleshooting formatting issues.
- Learn the common format marks: Familiarize yourself with the most common format marks so you know what you’re looking at when they’re visible.
- Use the Reveal Formatting pane: For a detailed view of the formatting applied to a specific section of text, select the text and press Shift + F1. This will open the Reveal Formatting pane, which shows all the formatting properties, including font, paragraph, and section settings.
Conclusion: Mastering Format Marks in Word 365
Learning how to control format marks in Word 365 gives you more control over your documents. Whether you want a clean writing space or need to troubleshoot tricky formatting problems, knowing how to show and hide these marks is a valuable skill.
By understanding what each mark represents and using the techniques described in this article, you can make your Word 365 experience smoother and more efficient.
FAQs
Can I print a document with format marks?
Yes, you can. If the format marks are visible on your screen, they will also appear in the printed document. To avoid printing them, make sure to hide them before printing.
What’s the difference between a paragraph mark and a line break?
A paragraph mark (¶) indicates the end of a paragraph. It creates a separation between paragraphs with distinct formatting. A line break (↵) simply moves the text to the next line within the same paragraph, without starting a new one.
How can I remove extra spaces between words?
Sometimes, you might accidentally insert multiple spaces between words. To remove these extra spaces, use the Find and Replace feature. In the “Find what” field, type two spaces. In the “Replace with” field, type one space. Click “Replace All” to remove all extra spaces throughout the document.
Why do I have a non-breaking space in my document?
Non-breaking spaces are used to prevent two words from being separated at the end of a line. For example, you might use a non-breaking space between a number and its unit (“10°kg”) or in a name (“Mr.°Smith”).
Is there a keyboard shortcut to show/hide format marks?
Yes, the keyboard shortcut to show/hide format marks is Ctrl + Shift + 8.


