Timberwall planks add a rustic and cozy feel to any room. But sometimes, it’s time for a change. Maybe you want to try a new color, or perhaps you’re ready for a different look altogether.
Whatever your reason, removing Timberwall planks might seem tricky, but with the right tools and approach, it can be a manageable DIY project. This guide will walk you through the process step-by-step, offering helpful advice and tips to make your removal project a success.
Understanding Your Timberwall Planks
Before you begin, it’s important to know what kind of Timberwall planks you have. This will determine the best way to remove them.
Types of Timberwall Planks
Timberwall offers different types of planks, each with its own installation method. Here are the most common:
| Plank Type | Installation Method | Removal Considerations |
|---|---|---|
| Reclaimed Wood | Nail-on | May require more force to pry off due to nails. Be careful not to damage the wall underneath. |
| Peel and Stick | Adhesive | May leave adhesive residue. Use a heat gun or adhesive remover to soften the glue before removal. |
| Click-Together | Interlocking | Usually the easiest to remove. Start from one end and gently work your way across, unlocking each plank. |
Assessing the Wall Behind the Planks
Knowing what’s behind your Timberwall planks is crucial for a smooth removal and repair process.
- Drywall: This is the most common wall material. You’ll need to be careful not to damage it during plank removal.
- Plaster: Older homes may have plaster walls, which are more delicate than drywall. Extra caution is needed to avoid cracks or holes.
- Concrete or Brick: Removing planks from these surfaces might require different tools and techniques.
Gathering Your Tools and Materials
Having the right tools will make the job easier and prevent unnecessary damage to your walls. Here’s what you’ll need:
- Pry bar: A flat pry bar is essential for lifting the planks from the wall.
- Hammer: Use a hammer to gently tap the pry bar for extra leverage.
- Pliers: Pliers are helpful for removing any nails or staples.
- Safety glasses: Protect your eyes from flying debris.
- Work gloves: Protect your hands from splinters and rough edges.
- Putty knife: Useful for scraping off adhesive residue.
- Heat gun (optional): Softens adhesive for easier removal of peel-and-stick planks.
- Patching compound: To repair any holes or damage to the wall.
- Sandpaper: To smooth the wall surface after patching.
- Drop cloths: To protect your floor from dust and debris.
How to Remove Timberwall Wall Planks: A Step-by-Step Guide
Now that you’re prepared, let’s get those planks off the wall!
Step 1: Prepare the Room
- Clear the area around the wall. Remove any furniture or decorations that might get in the way.
- Lay down drop cloths to protect your floor.
- Put on your safety glasses and work gloves.
Step 2: Locate a Starting Point
- If possible, start at a corner or edge of the wall.
- For click-together planks, begin at the end of a row.
- For peel-and-stick planks, choose a section that seems loose or has a visible edge.
Step 3: Gently Pry Off the First Plank
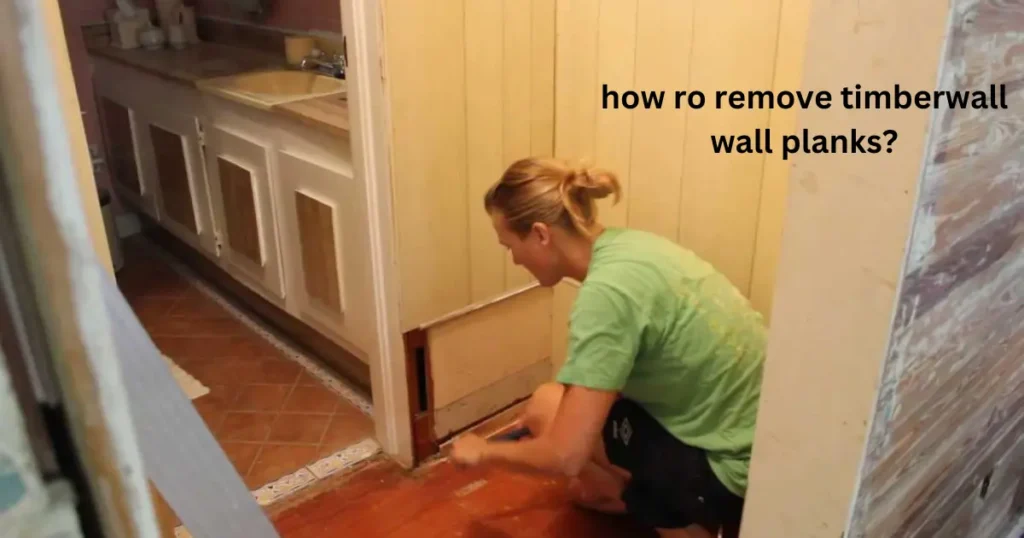
- Carefully insert the pry bar between the plank and the wall.
- Gently tap the pry bar with the hammer to create some space.
- If the plank is nailed, use the pliers to remove any nails that become exposed.
- Continue prying and removing nails until the plank comes loose.
Step 4: Continue Removing Planks
- Work your way across the wall, removing one plank at a time.
- For peel-and-stick planks, you may need to use a heat gun to soften the adhesive.
- Be patient and work carefully to avoid damaging the wall.
Step 5: Clean Up the Wall
- Once all the planks are removed, use the putty knife to scrape off any remaining adhesive.
- If there are any holes or damage to the wall, use patching compound to fill them in.
- Let the patching compound dry completely, then sand it smooth.
Step 6: Dispose of the Planks
- If your planks are in good condition, consider selling them or giving them away.
- Otherwise, dispose of them according to your local regulations.
Repairing the Wall After Timberwall Removal
After removing your Timberwall planks, you’ll likely need to do some wall repair. Here’s a closer look at common issues and how to fix them:
Dealing with Damaged Drywall
- Small holes: These can be easily filled with patching compound.
- Large holes: You may need to use drywall tape and joint compound to create a smooth surface.
- Cracks: Apply joint compound over the cracks, then sand smooth.
Addressing Adhesive Residue
- Heat gun: Apply heat to the residue to soften it, then scrape it off with a putty knife.
- Adhesive remover: Follow the manufacturer’s instructions for safe and effective removal.
Prepping for a NewLook
- Sanding: Sand the entire wall to create a smooth and even surface for painting or wallpapering.
- Priming: Apply a primer to ensure proper adhesion of your new finish.
Tips for Removing Timberwall Wall Planks
- Work slowly and carefully. Rushing can lead to damaged walls and frustration.
- Use the right tools. The correct tools will make the job easier and prevent damage.
- If you encounter resistance, don’t force it. Try a different approach or tool.
- If you’re unsure about any part of the process, consult a professional.
By following these steps and tips, you can successfully remove your Timberwall planks and prepare your walls for a fresh new look.
Summary
Removing Timberwall wall planks is a project you can tackle yourself with the right information and tools. Remember to identify your plank type, assess the wall behind it, and gather the necessary materials before you begin.
Work patiently and methodically, using the step-by-step guide to remove the planks and repair any damage to the wall. With careful preparation and execution, you can achieve a smooth and damage-free wall ready for your next design adventure.
FAQs
How do I remove Timberwall planks without damaging the wall?
The key is to work slowly and gently. Use the right tools, like a pry bar and hammer, and avoid excessive force. If your planks are glued on, apply heat with a heat gun to soften the adhesive before prying.
Can I reuse Timberwall planks after removing them?
It depends on the condition of the planks after removal. If they’re in good shape and you were careful during the process, you may be able to reuse them. However, if they’re damaged or broken, it’s best to dispose of them properly.
What’s the best way to get rid of adhesive residue from Timberwall planks?
A heat gun can be very effective in softening the adhesive, making it easier to scrape off with a putty knife. You can also use an adhesive remover, following the manufacturer’s instructions carefully.
What should I do if I damage the wall while removing the planks?
Don’t worry, minor damage is usually easy to repair. Small holes can be filled with patching compound, while larger holes might require drywall tape and joint compound. Sand the repaired area smooth before painting or applying a new wall finish.
Do I need to hire a professional to remove Timberwall planks?
While it’s possible to remove Timberwall planks yourself, if you’re unsure about any part of the process or uncomfortable with DIY projects, it’s always best to consult a professional. They have the experience and expertise to ensure a safe and successful removal.
